Code-Along Project With MapKit for SwiftUI - Part 1
MapKit for SwiftUI got some major additions for iOS17, let's see them together!

(For iOS17 and Xcode 15 beta)
Exploring SwiftUI with MapKit can be quite fun.
In iOS 17 and macOS 14, MapKit has reached a new level with a few new additions for SwiftUI. Keep in mind that these views and modifiers are still in beta and are subject to change without notice.
This brief series of posts draws inspiration from the WWDC23 talk: WWDC23 - Meet MapKit for SwiftUI
This is a code-along project, the main branch has the starter project in Xcode, which is mostly empty. It should just only display a map of your region.
You can check the 'completedProject' branch of the project on GitHub for the finished version: The GitHub repo with the project
The next episodes in this series will show how to display a route and how to integrate LookAround into your project.
Part 1 - display default search results
In a new iOS project I remove the boilerplate code, I add import MapKit and add Map() to the ContentView() and this alone is already enough to show the map in the preview. In SwiftUI Map is defined as a view that displays an embedded map interface and is available when SwiftUI is imported with MapKit already since iOS14!

Behind the scenes, there is a MapContentBuilder which adds content to your map including, markers, annotations, and overlays which we already know from the UIKit version of Map.
The Xcode preview by default will show the map of the region you are in when building the app. This is the standard behaviour when no parameters are passed in the map initializer.
Our voyage commences in Normandy's charming Rouen. A weekend bike escapade awaits, taking us surfing and coastal exploration. For convenience, we've designated our starting location as a static variable in an extension. Just a clean way to store our first variable.
Utilizing the map builder closure, we bring this location on the map:
extension CLLocationCoordinate2D {
    static var start = CLLocationCoordinate2D(latitude: 49.7071, longitude: 0.2064)
}

struct ContentView: View {
    var body: some View {
        Map {
            Marker("Start", coordinate: .start)
        }
    }
}
The marker is okay but perhaps a bit boring. We can do better with annotations! replace the marker with this:
Annotation("Start",
  coordinate: .start,
  anchor: .bottom
){
Image(systemName: "flag")
 .padding(4)
 .foregroundStyle(.white)
 .background(Color.indigo)
 .cornerRadius(4)
}
Add buttons
For the buttons, I would like to use a translucent bar at the bottom of the full-screen map. I will use a safeareainset with my buttons inside. The buttons will allow me to display a search for cafés and beaches.
Create a new SwiftUI file – MapButtonView –, import MapKit and insert the following into its body:
The buttons
        HStack {
            Button {
                search(for: "cafes")
            } label: {
                Label ("Cafes", systemImage: "cup.and.saucer.fill")
                .frame(width: 44, height: 44)
            }
            .buttonStyle(.borderedProminent)

            Button {
                search(for: "beach")
            } label: {
                Label ("Beaches", systemImage: "beach.umbrella")
                .frame(width: 44, height: 44)
            }
            .buttonStyle(.borderedProminent)
        }
        .labelStyle (.iconOnly)
NB: The label icons due to the nature of SF Symbols, have different heights and it doesn't look so well aligned when displayed next to each other. Adding a frame modifier to the HStack would not solve the problem. I need to insert the frame modifier before applying the borderedProminent button style or it will not change! Pressing the button will trigger the search. The results will be stored in a searchResults variable. It will be a `binding` because we will pass the results to our parent view...
Here I will store my results, as an array of MKMapItem :
@Binding var searchResults: [MKMapItem]
Here is the search function to be added in the struct but outside the body of course.
    func search(for query: String) {
        let request = MKLocalSearch.Request ()
        request.naturalLanguageQuery = query
        request.resultTypes = .pointOfInterest
        request.region =  MKCoordinateRegion (
            center: .start,
            span: MKCoordinateSpan (latitudeDelta: 0.0125, longitudeDelta: 0.0125))

        Task {
            let search = MKLocalSearch (request: request)
            let response = try? await search.start ()
            searchResults = response?.mapItems ?? []
        }
    }
When I pass my query, I pass a string describing the map-based item I want to look for. From the Map documentation:
The text is equivalent to what the user would type in a search field in the Maps app. For example, the text might contain all or part of an address or it might contain the name of a point of interest.
I used it with the hardcoded value, but I believe it can be extended maybe with Siri or using a search box in the app where the user can type some text. The result type is filtered by point of interest. In the Apple documentation there is a list of them:
https://developer.apple.com/documentation/mapkit/mkpointofinterestcategory
You will need to update the preview macro:
#Preview {
    MapButtonView(searchResults: .constant([]))
}
Back in my contentView, I'll add a @State property to store the search results.
@State private var searchResults: [MKMapItem] = []
I will add the buttons above the map at the bottom of the screen. I will use the safeAreaInset view for this. In my Map() content builder I add the buttons
.safeAreaInset(edge: .bottom) {
    HStack {
        Spacer()
        MapButtonView(searchResults: $searchResults)
            .padding(.top)
        Spacer()
    }
    .background(.thinMaterial)
}
Now that I get my search result when the user taps the button, I need to display it in the map. I add a ForEach in the content builder which will create the markers for each result:
ForEach(searchResults, id: \.self) { result in
    Marker(item: result)
}
.annotationTitles(.hidden)
Initializing markers in this way I make use of the labels provided by MapKit which will have the default bubble and image for the search result. MapKit composes a label using available information, such as the name property of label. See more in the Apple docs here. By default, Marker shows a map pin icon in its balloon. You can provide your own icon using an Image asset or a system image. You can also show up to three letters of text using a monogram. You can change the Marker’s colour using the tint modifier...
Try to press a button and see what happens. In Xcode 15 beta the previews are interactive. Notice how the map view gets resized automatically to include our search results. I think this is quite nice! The markers icons are out of the box the default ones provided by Apple Maps:
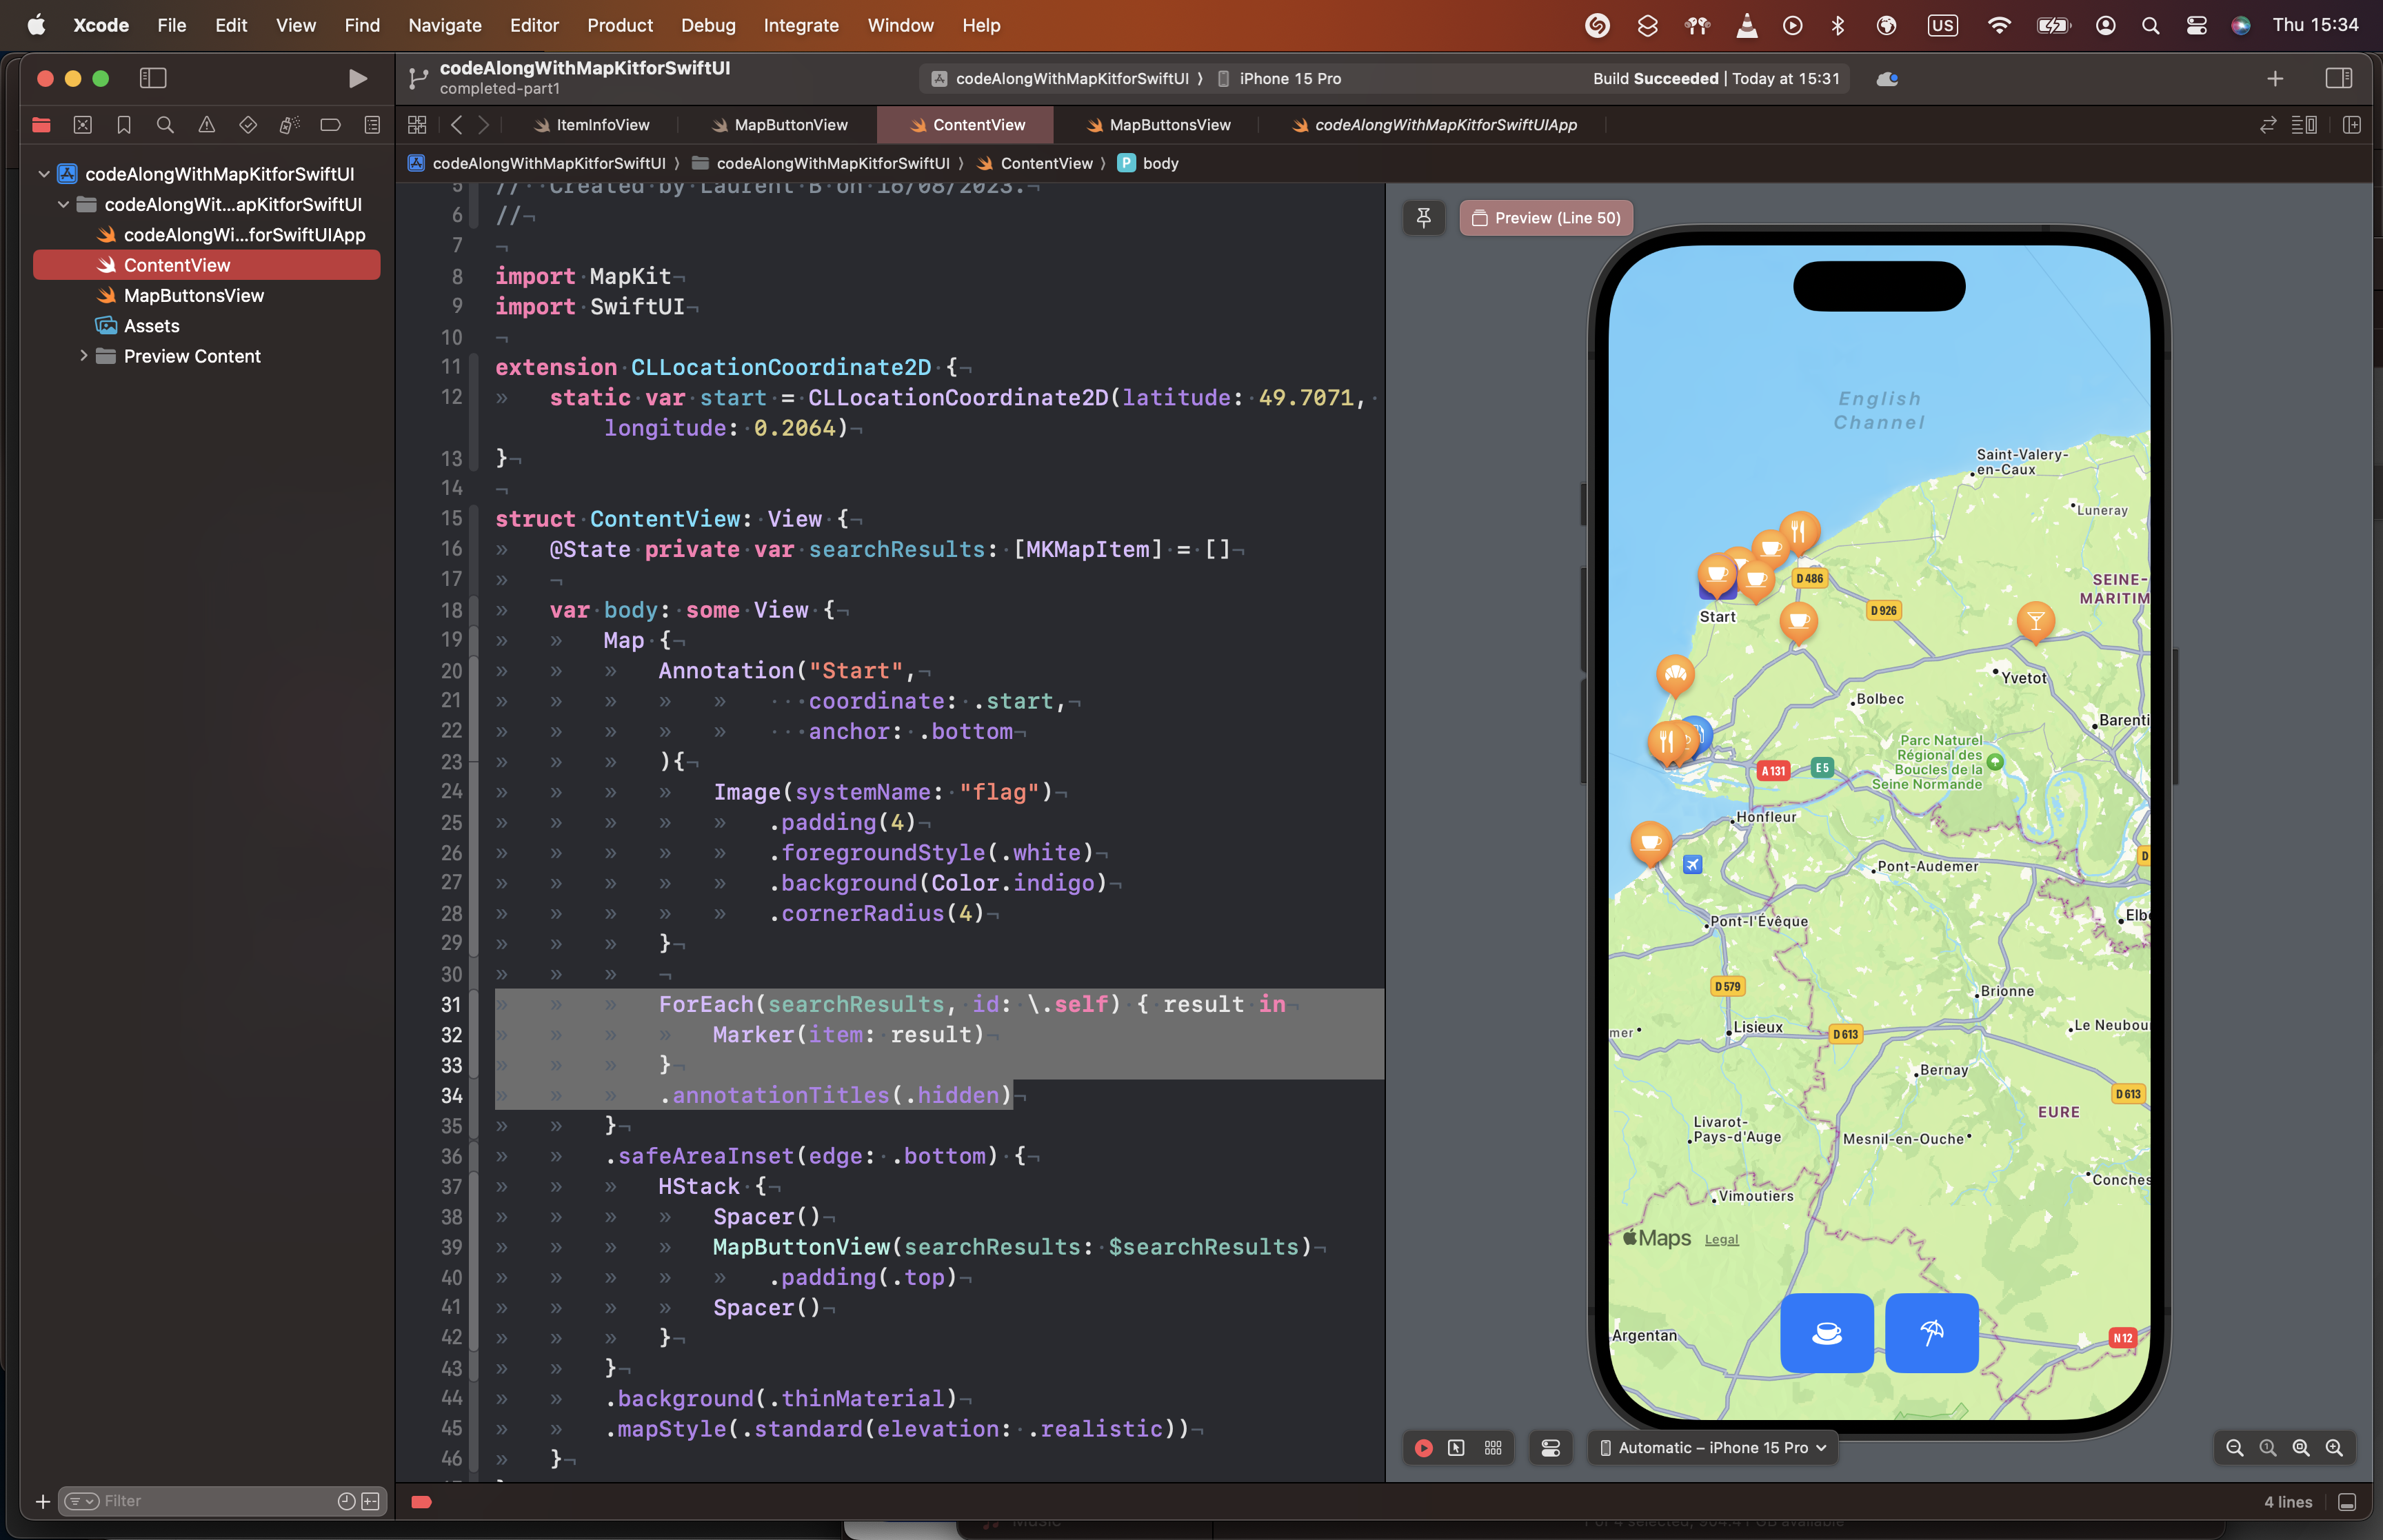
In case you'd prefer to hide the annotation's title, apply the .annotationTitles(.hidden) modifier to the map(). Moreover, diverse map styles are available.
I can use mapStyle to display satellite or flyover imagery. There are a few options to choose from:.mapStyle(.standard),.mapStyle(.standard(.realistic)),.mapStyle (.imagery (elevation: .realistic)),
and .mapStyle (.hybrid(elevation: .realistic)).
I used .mapStyle(.standard(elevation: .realistic)).
And that's it for today. See you in the next post of the series! :)
Relevant Links
The GitHub repo with the project start
The completed part 1 on GitHub

