Setting up this year advent of code 2021 in Swift

This article is about me setting up my system and planning my coding strategy for the Advent of Code 2021.
Every time I do the advent of code I learn something new and eventually, trying new things never done before, unexpected problems pop up right at the beginning.
This is why typically the first challenge of the series is very easy and meant as a sanity check, like, do I get my input, can I print the output? This sort of thing.
Also, some people chose to do the challenges in a different language or environment from the one they are usually working on. I have seen in the past somebody did the challenges every day in a different programming language!
But I will stick to Swift. For now, swift is my preferred choice because I still love it so much and also there is untapped depth in Swift that I still need to explore. It is a language for everyday use and still, it offers so many different levels of difficulty, from functional programming to generics and it is still evolving a lot every day and I am so excited about it.
Using the command line app template in Xcode for the challenges
Last year I used Playgrounds and it was lots of fun.
This year I wanted to create a different work environment and try to use the command line app template in Xcode. Something I never use.
First obstacle: where is my input file?
Mostly every challenge comes with an input file.
Little did I know that this command line app template doesn’t come with a Bundle.
So funny enough the first question that popped into my mind for the challenge is not, how do I solve this challenge but rather, how do I get this input.txt file to be recognised by command line swift script.
You see, in macOS Swift, we usually use bundles in our app. Bundles are convenient because we just need two lines of code and we can get the URL of the file in question. Using a command-line app I do not want to search my entire hard disk for a file, or hard code the location somewhere...
As an iOS developer, I am quite used to working with a Bundle. If you don't know a Bundle is like a directory containing the resources you need to run your app and provides easy access.
To find a file in the bundle you typically just need the name of your file with the extension eventually, without needing the exact location in the bundle.
It is very convenient.
Oh look, there is even a wikipedia) article. Apparently, the bundle has been there since the NeXTSTEP operating system.
We stand on the shoulders of giants.
Luckily there is a solution. And I thought I will share it with you.
If you think this might interest you, then please keep reading...
This is how to create a custom bundle in your command line app
Especially useful for a command-line app, since there is no main bundle defined...
In Xcode, go on File --> New --> Target...
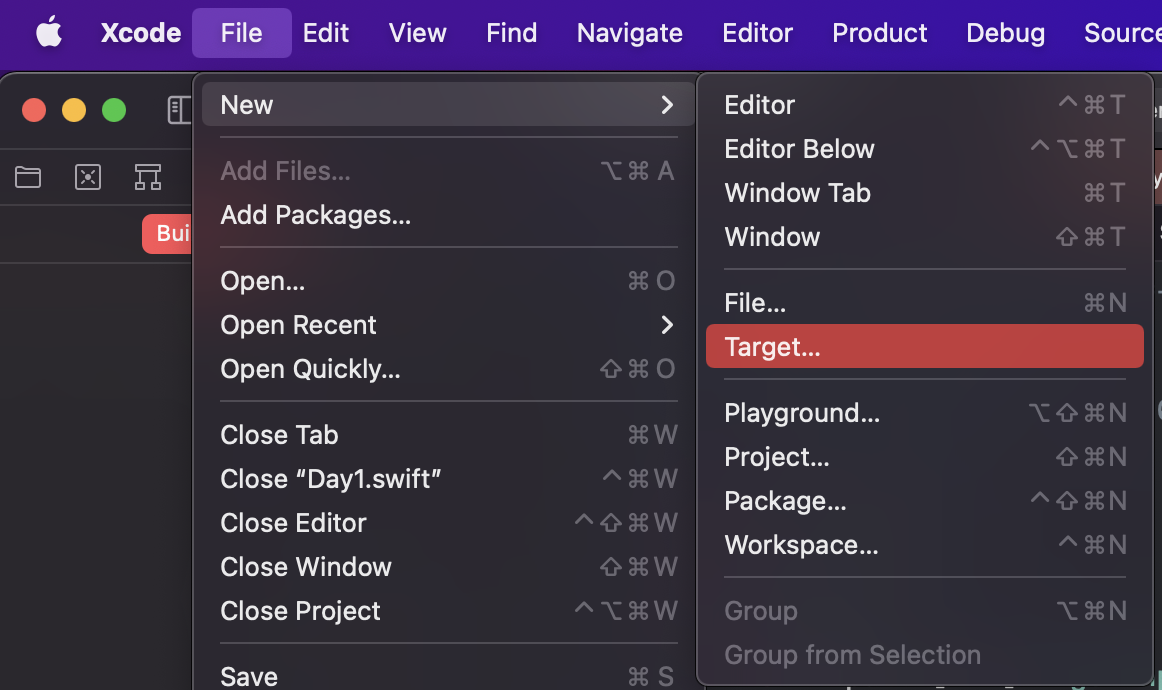
Look for a bundle:
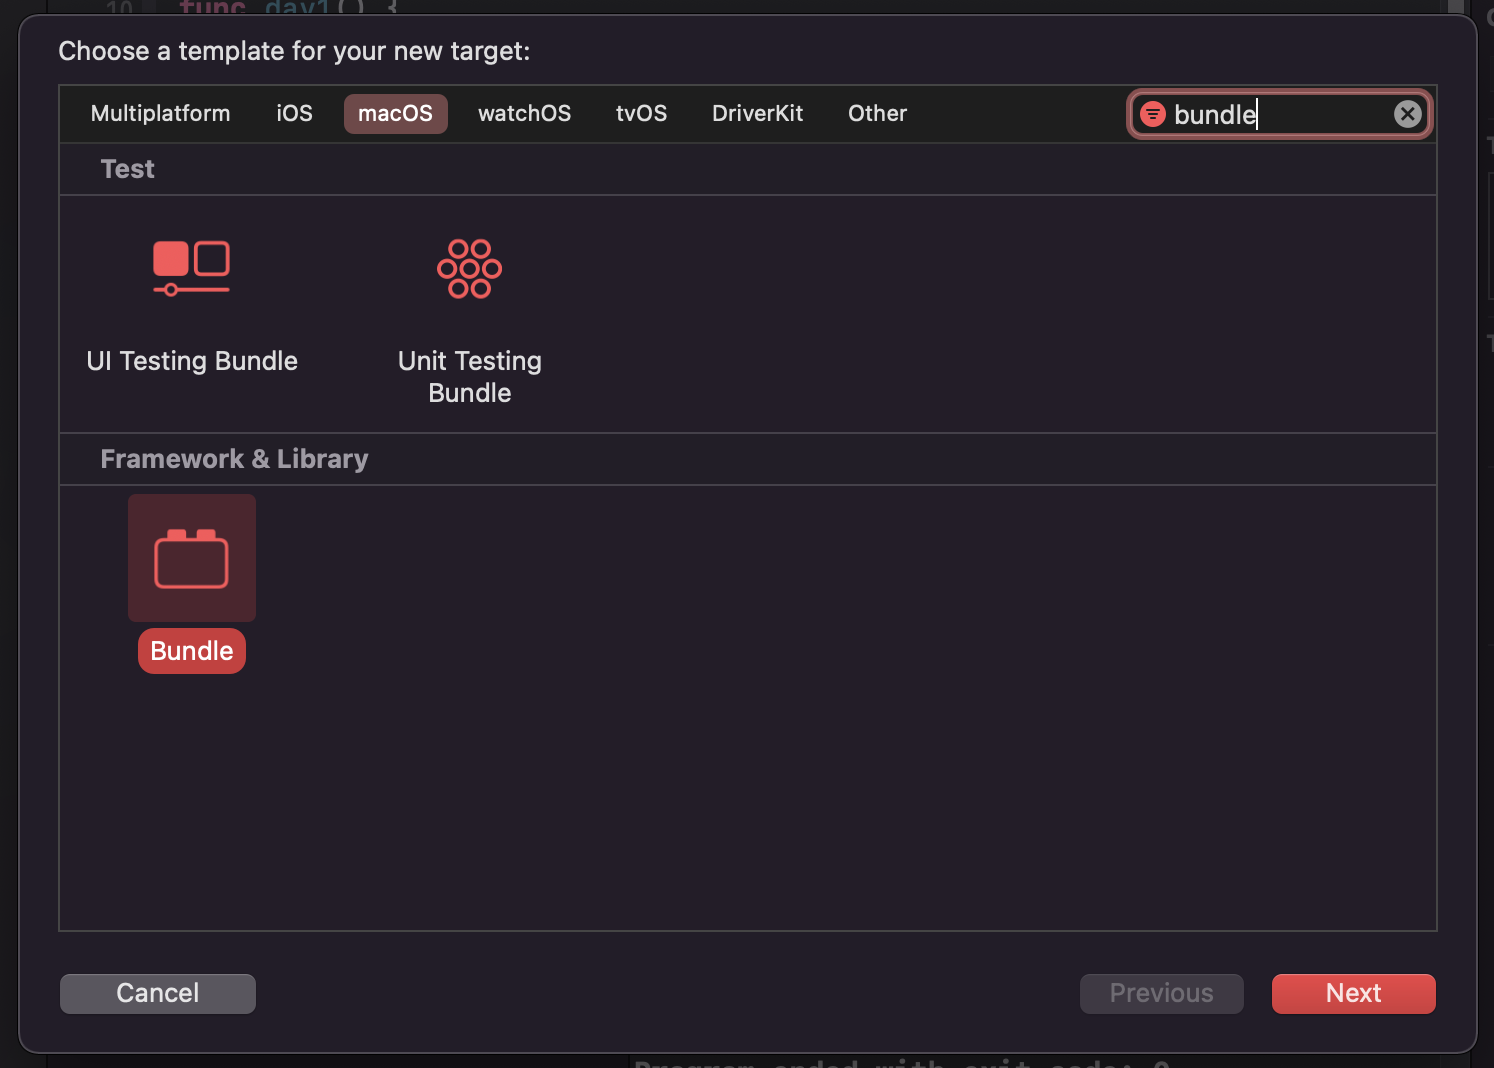
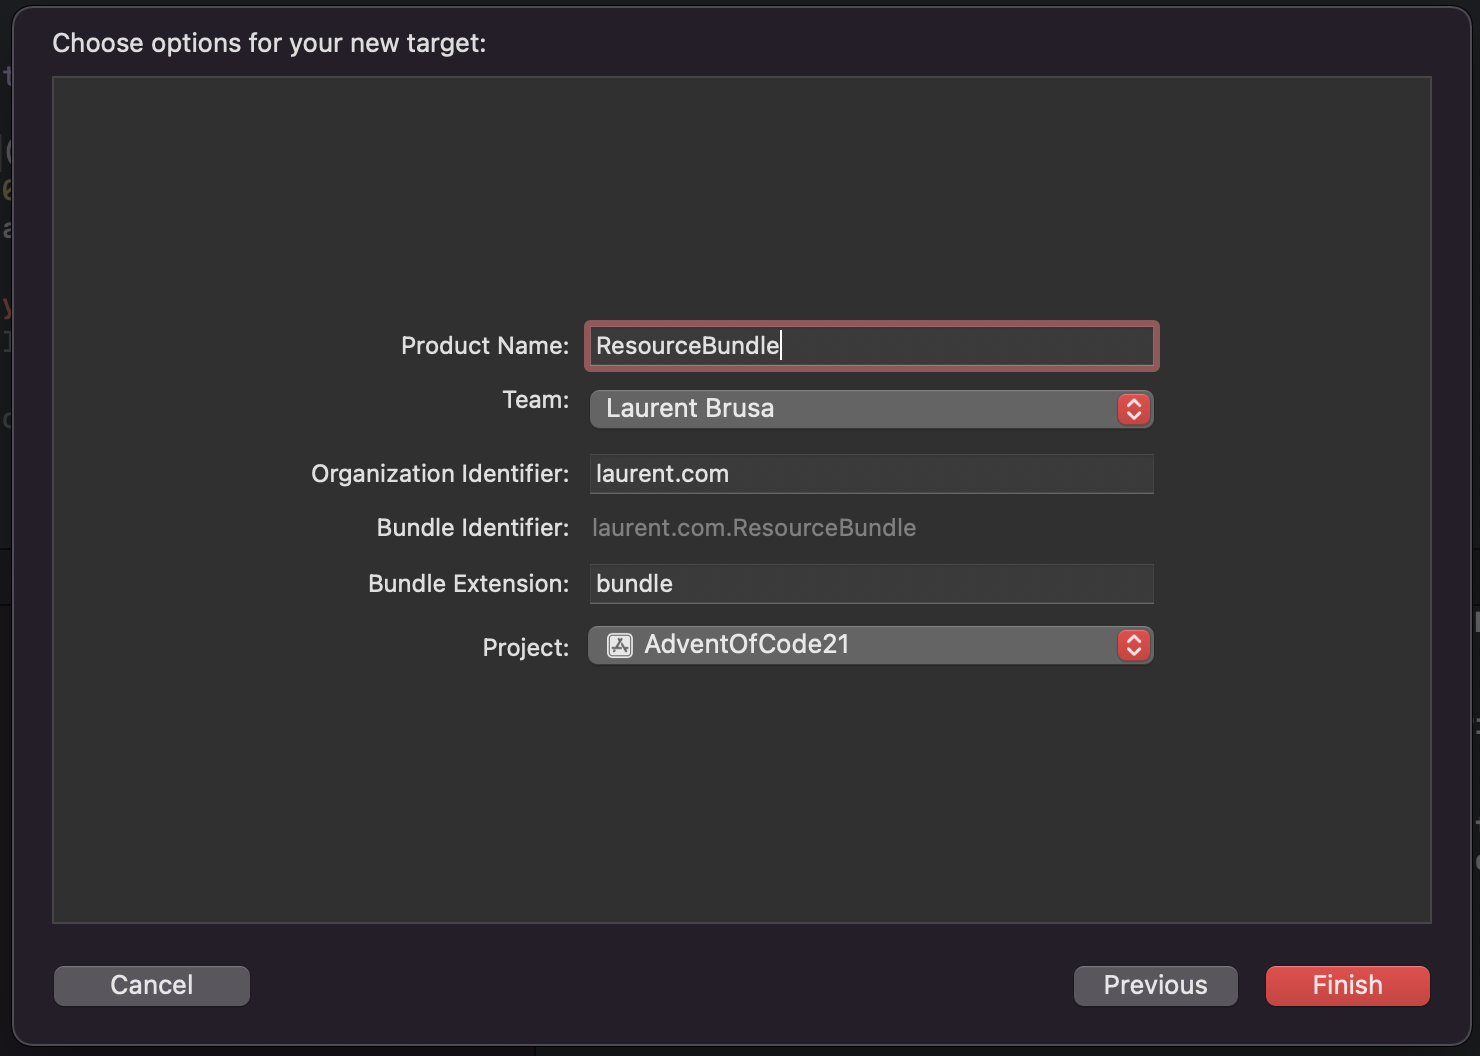
Give it a name
When you add a file make sure that the bundle box is ticked, so that the file gonna be in your bundle:
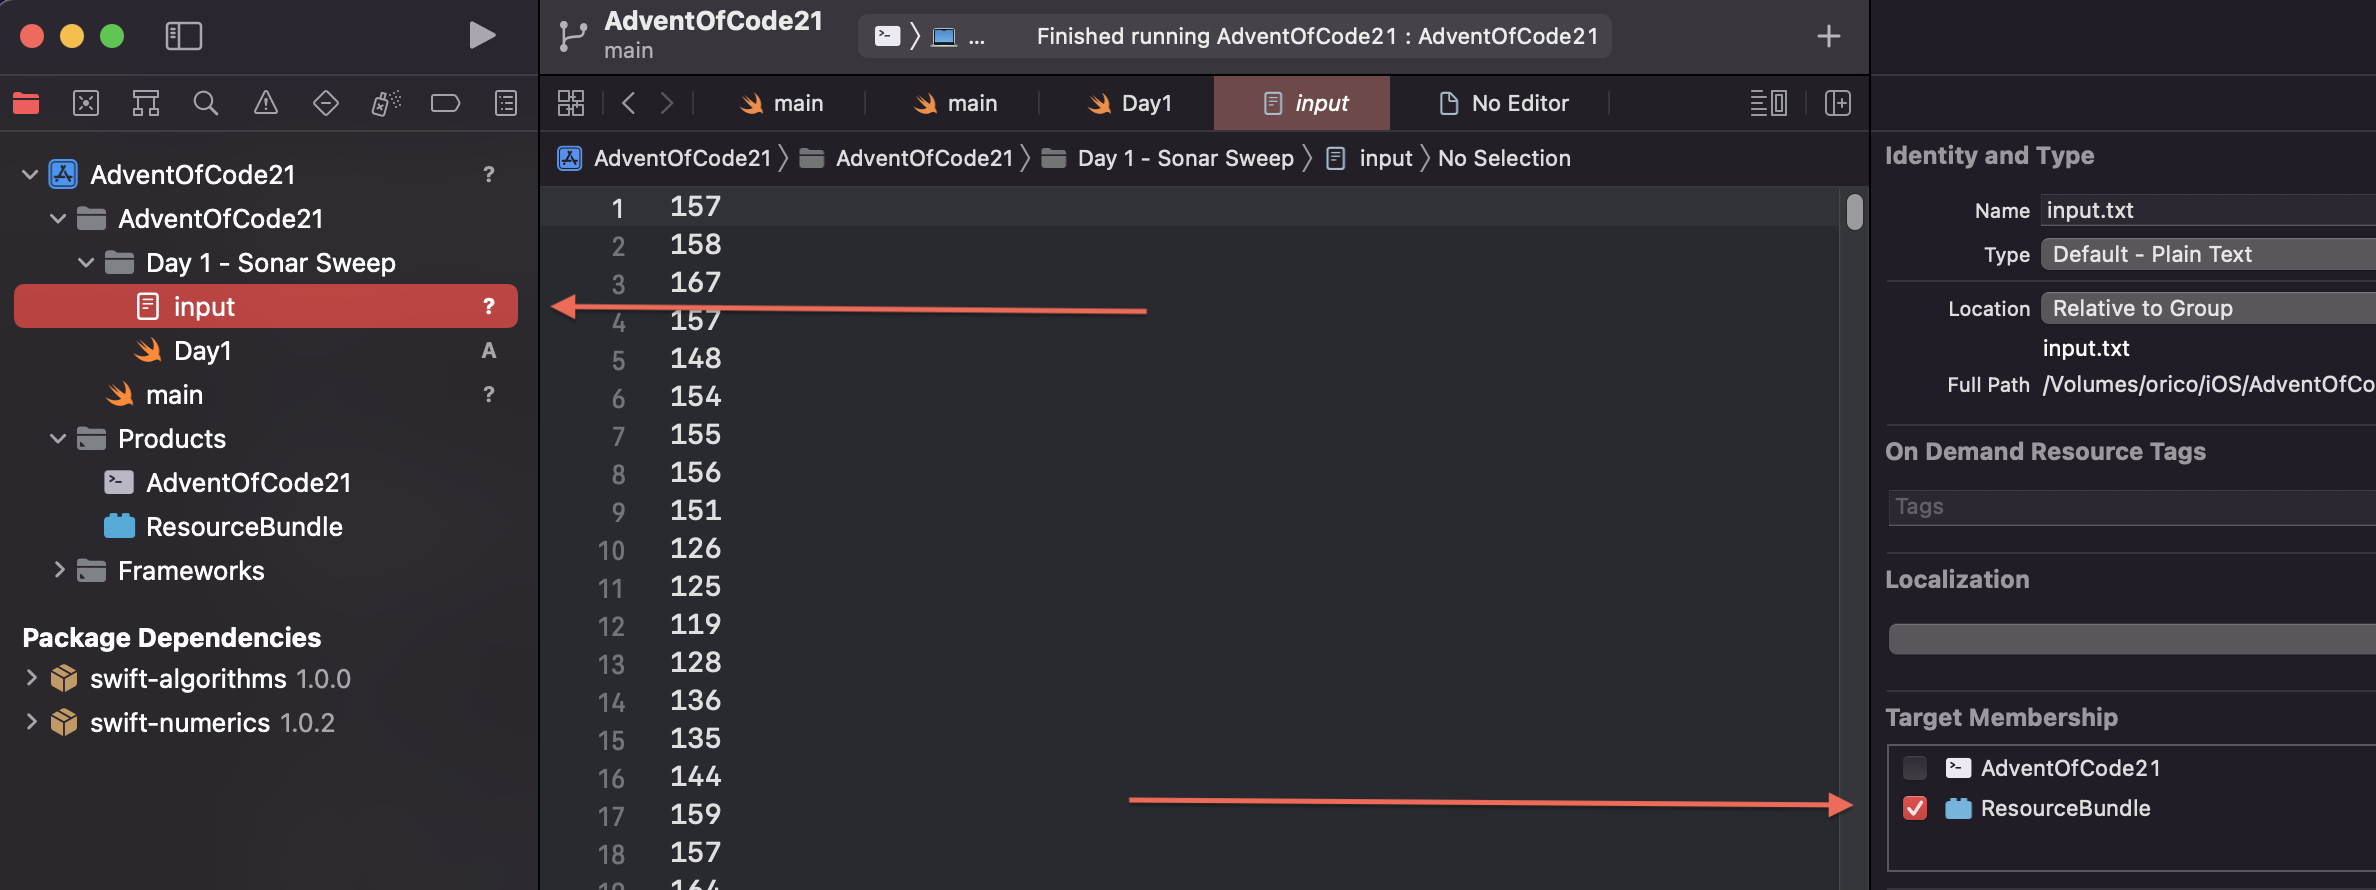
and the last but very important step is to add the bundle to your command line app target in the build phases.
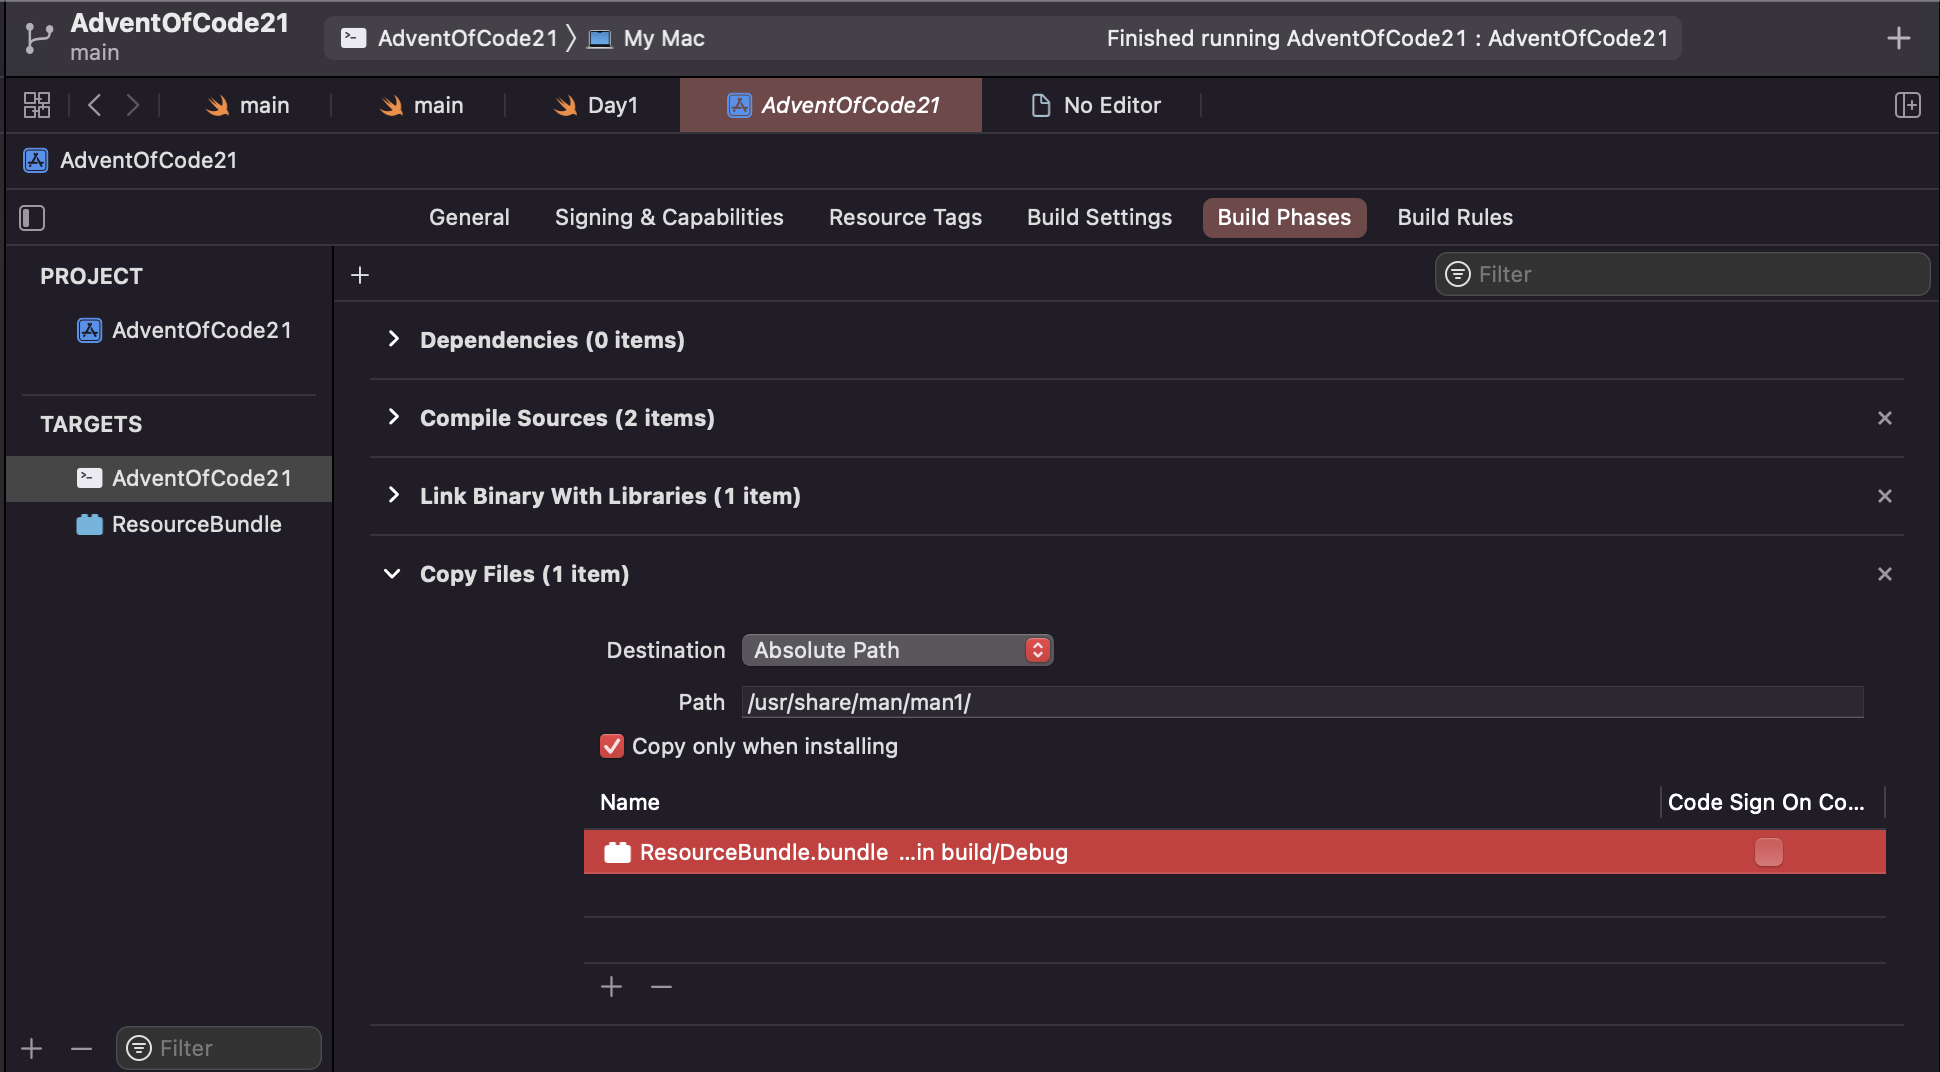
And after all that is done, this is how you access the bundle in code. Be very careful to use exactly the name as you called your bundle, in my case is ResourceBundle.bundle or it will not work.
func getInputDay1() -> [Int] {
    var input: [Int] = []
    do {
        let currentDirectory = URL(fileURLWithPath: FileManager.default.currentDirectoryPath)
        let bundleURL = URL(fileURLWithPath: "ResourceBundle.bundle", relativeTo: currentDirectory)
        let bundle = Bundle(url: bundleURL)
        if let inputFileURL = bundle?.url(forResource: "input", withExtension: "txt") {
            do {
                input = try String(contentsOf: inputFileURL)
                    .split(separator: "\n")
                    .compactMap { Int($0) }
            } catch {
                print(error.localizedDescription)
            }
        }
    }
    return input
}
The first Challenge of the advent of code 2021
After making sure that I have access to my input file folder, completing the first challenge was a breeze.
For additional fun, a hint by Paul Hudson on Twitter led me to explore the Swift Algorithms package, and there I found exactly the functions that I needed to write better code, and more performant even. I know this challenge was not very difficult anyway, but I had the chance to apply something new and this was satisfying.
My input file is just a long list of numbers corresponding to depth measurements.
Count the number of times a depth measurement increases from the previous measurement.
Usually it could be solved this way, using adjacentPairs from the algorithm package, with a loop:
 var solutionDay1a = 0
 for pair in input.adjacentPairs() {
     if pair.0 < pair.1 {
         solutionDay1a += 1
     }
 }
Writing shortcode can sometimes be more difficult to read but it’s not always bad.
In this case, using functional programming:
- it actually has better performance because being optimised for fast execution, so operations on large arrays are performed lazily, which means that data is written when needed skipping intermediate steps.
- Functional programming can be better readable than a longer chunk of code. For instance, when I see a map operator, I know that each element of an array is being transformed with the code in the body of the map without side effects. And the results are being passed to the next operator etc.
Here I split my input array into adjacent pairs and each one is being reduced into one total sum. In each pair, I check whether the first variable is smaller than the second and if so I increment the total sum.
let solutionDay1a = input
    .adjacentPairs()
    .reduce(into: 0) {  total , pair  in
        total = (pair.0 < pair.1) ? total + 1 : total
    }
This can be written more tersely like this, but maybe is not very clear anymore what is happening 🙈
 let solutionDay1a = input.adjacentPairs().reduce(0) {
    ($1.0 < $1.1) ? $0 + 1 : $0
}
The second part
It is just like part 1, only that I look over a window of three measurements to check if the next window is bigger, then I increment my total. This again was not difficult using the algorithm package. There is a windows function made specifically for this case. :)
let solutionDay1b = input
        .windows(ofCount: 3)
        .map {$0.reduce(0,+)}
        .adjacentPairs()
        .reduce(into: 0) { partialResult, windowSums in
            partialResult = (windowSums.0 < windowSums.1) ? partialResult + 1 : partialResult
        }
Now how to execute the binary?
There are a few ways. You first need to compile the app in Xcode with command-B and in the product folder, you will find the executable. Right-click it and open in Finder for instance to get the path.
In your terminal window type cd and drag the file to your window and press enter.
For example, mine will look like this:

Once you are in that folder you can simply type:
./AdventOfCode21 #Name of your app or executable here
Of course, there is more to it, but this is a good start! 👍🏻
Sources:
My GitHub repo with the challenges
adventofcode.com
bundle Apple Docs
StackOverflow
www.raywenderlich.com

